An automated test system uses software-driven test equipment to run predefined tests on devices or systems without human intervention. Automated RF test systems are used in numerous applications such as high-volume manufacturing, aerospace and defense systems, RF component design and validation, and telecom infrastructure and maintenance. Automated systems relieve engineers from manual configuration and recording functions and improve the repeatability and reliability of the testing process.
In this tutorial, we will provide an overview of how to automate your Signal Hound spectrum analyzers using SCPI commands within Spike software.
What is SCPI?
SCPI, or Standard Commands for Programmable Instruments, provides a common syntax, command structure, and data interchange format which can be used across multiple SCPI compatible test and measurement instruments and is hardware independent. SCPI syntax is ASCII text and therefore can be attached to any computer test language, such as Python, C, or C#.
By using SCPI commands with Signal Hound’s Spike software, you can easily automate spectrum scans, set measurement parameters, retrieve data, and execute repetitive testing routines — all without manual interaction. This is particularly useful for our customers looking to automate factory validation testing.
How do I connect my Signal Hound device to Spike?
Spike software must be installed on your PC so you can interface with your Signal Hound spectrum analyzer. Navigate to Signal Hound’s Spike software page and download the version of Spike appropriate for your system.
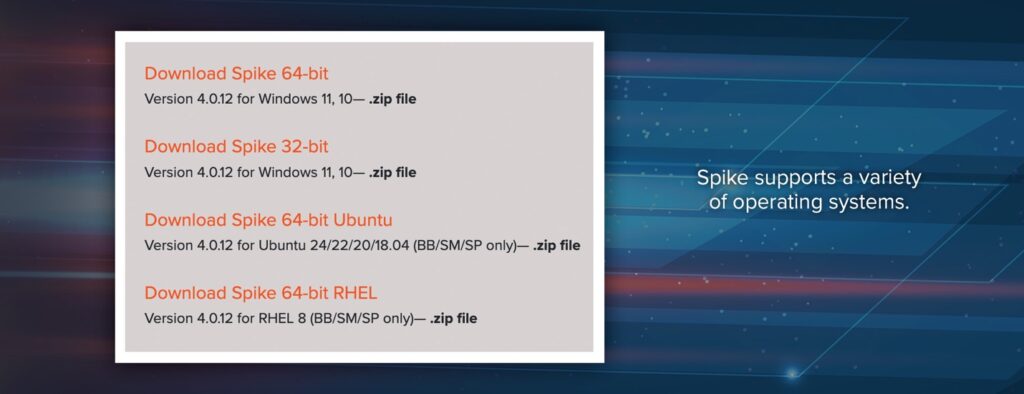
The Spike software page includes version notes, as well as an FAQ section for reference. Once downloaded, extract the files and from within the directory, open the Spike installer and click through the installation prompts.
Once the software is installed, you can connect your Signal Hound spectrum analyzer. You’ll need to connect an antenna or source to the spectrum analyzer. Always know the power output of your source and avoid damaging your front end from ESD or RF input power by using a limiter or external attenuation as needed. Remember to ground yourself before touching exposed antenna elements. Once you have the source or antenna connected, using the USB cable included with your spectrum analyzer, connect the cable to your spectrum analyzer and plug the unit into an open USB port on your PC.
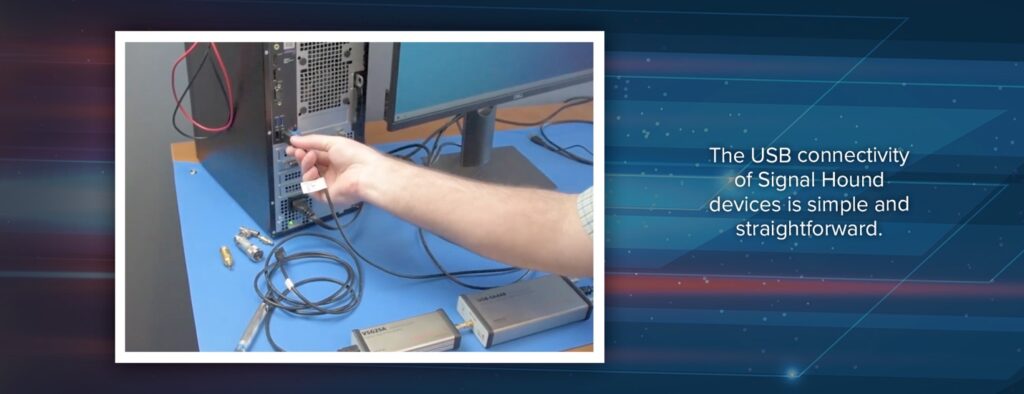
Then when you open Spike, the software should auto-detect all Signal Hound devices connected to your PC.
If you have more than one Signal Hound spectrum analyzer, you can launch multiple instances of Spike for each analyzer. One instance of Spike can only interface one spectrum analyzer.
How do I send SCPI commands to configure measurements and automate data collection?
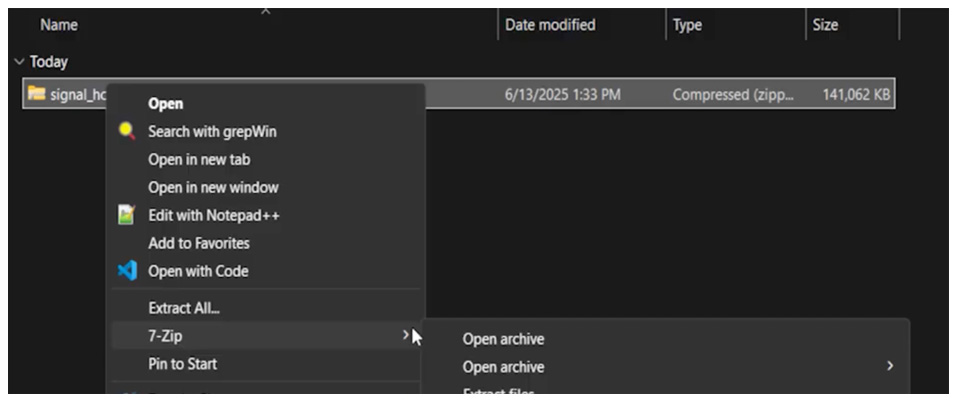
Start by downloading the Signal Hound Software Development Kit (SDK).
- Scroll to the bottom of the SDK page to find the download link
- Once fully downloaded, you’re going to want to extract it
- Next, navigate into the SDK. At the top level you will see SCPI, device API, and SHR parser
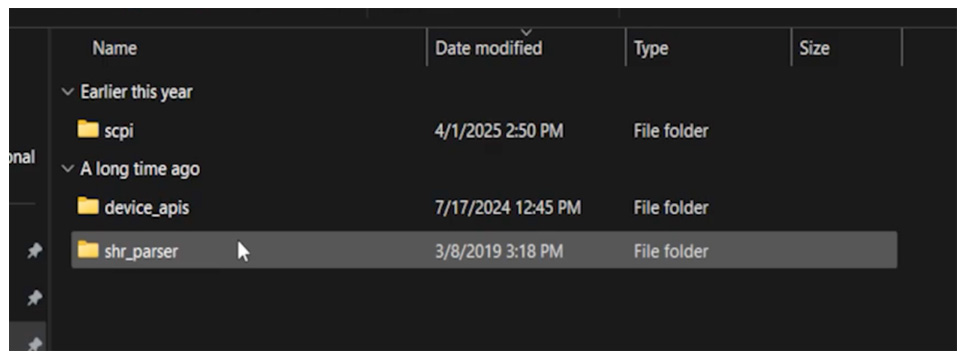
- Select SCPI
When a SCPI connection is active and a command is received, the Spike software enters a remote operation mode. When in remote operation, a modal dialog appears in the center of the Spike application. To return to local operation either press the “Return to Local” button or close the dialog. If another SCPI command is received, the dialog will reappear.
The ‘Read Me’ file within the SDK lists the necessary prerequisites and includes information you will need to install everything correctly. Python 3 is required, and PyVISA along with its dependencies must be installed. PyVISA is a frontend for a VISA library such as National Instruments’ VISA and Keysight IO Library Suite. A backend library such as these must be installed.
Connecting to the socket interface using VISA looks like this:
viOpen(rm, “TCPIP::localhost::5025::SOCKET”, VI_NULL, VI_NULL, &inst);

Additionally, when using a VISA library, it is necessary to set theVI_ATTR_TERMCHAR_ENattribute to “true”. This will terminate the read operation when the termination character is received.
The termination character should be set to the newline (‘\n’) character if it is not set by default.
The code for this is below.
viSetAttribute(inst, VI_ATTR_TERMCHAR_EN, VI_TRUE);
viSetAttribute(inst, VI_ATTR_TERMCHAR, '\n');
Only one connection to the Spike software can be active at a time. The connection can be terminated by either closing the socket connection, either through the socket library you are using, the viClose function if you are using a VISA library, or by closing your application. Spike will immediately begin waiting for another socket connection when the previous one is ended.
The Spike SCPI programming manual and examples are available as a part of the Signal Hound SDK.

The manual covers the basics of SCPI commands, how to get started programming the Spike software, and will cover the full SCPI command set implemented by the Spike software.
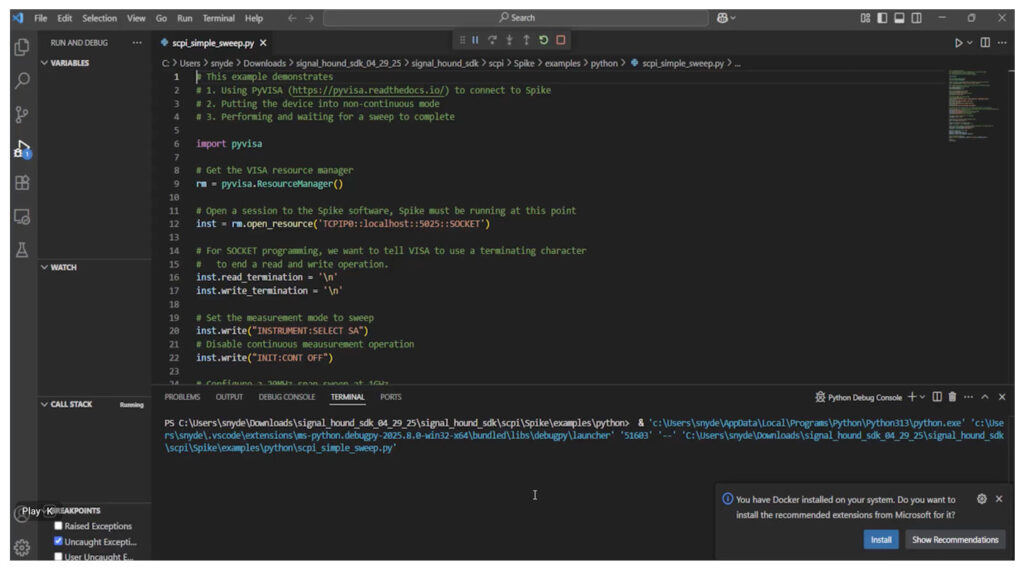
To run an SCPI example, launch Spike, go to examples, and then Python. These programs can provide a basis on which you can build custom programs for automating Signal Hound spectrum analyzers.
SCPI commands can and will change as the Spike software evolves. It is recommended that when you update Spike in an installation that is controlled via SCPI, you review the version notes and determine if any functionality needs to be updated.
Sources
IVI Foundation: The SCPI Standard
https://www.ivifoundation.org/About-IVI/scpi.html